Instagram

Wednesday 11 December 2013

Back to Black (or nearly black)


Big and Black


Blackboard paint. 

I’m slightly obsessed with blackboard paint it’s pretty mainstream nowadays but when I first started using it about 10 years ago (I’m still in love with it 10 years later) I used to buy it in France in tiny pots. I have used it on entire walls in children’s bedrooms as well as on lots of bits of furniture big and small. 


As I remove or add things  I alter my 'In The Freezer'  list. 
In every house I’ve lived in in the last 10 or so years I’ve always had at least one wall painted with blackboard paint to serve as a notice board, a place to make lists etc..etc.. It not only looks great, it’s genuinely really useful. (See the Jars and Organising blog for photos of my last London kitchen).
In my current utility room I have a boxed in freezer and the side is painted with blackboard paint (see above) so I can list what’s in the freezer, the idea being I can see at a glance what I have without having to rummage through all the drawers.


On drawers like these where the contents don't change use a wet chalk marker
I have applied the same idea of listing the contents on cupboard doors where I keep all my scraps and sewing paraphernalia and I've painted drawers and wooden file holders which house stationery supplies. As the contents change just rub out and change the list.


Small and Black

Black Soap.

I always buy black soap when I see it. I hoard it. It looks very stylish and this particular brand smells lovely but best of all, unlike pale coloured bars of soap, it never looks dirty. 


Instead of traditional soap dishes I use either black slate tiles or flea market finds like this little (once silver) dish.

All Black


Nearly Black walls

I absolutely love really strong dark colours in interiors. When faced with a small room the usual solution is to paint it white to make it seem bigger. 

In my opinion this fools nobody and painting it a dark colour makes it more interesting. Furthermore a really dark wall colour is a fantastic way of uniting disparate decorative elements and making your pictures, photos, plates - whatever you have on your wall really stand out and if your walls are less than perfect it’s much less noticeable with strong dark colours. 

Start really small, the first room I painted a very, very dark grey was a loo. But by the time we left our old Blackheath house in Southeast London I’d moved onto much bigger stuff - the dining room.
It was off black with monochrome prints, pictures, photos, bugs in cases etc...
I created a ‘side board’ underneath (just seen) by placing four IKEA ‘Malm’ chests of drawers side by side painting them all the same colour as the walls and installing a single long counter top 
                                     
    In order to have some light reflection, I added a picture rail and brought the off white  ceiling colour down to meet it.


Outdoors and Black

                                           
Nearly black, our very own leaf mould. Two years in the making.

Leafmould 

You know you’re middle aged when you are excited by leafmould. Nearly three years after moving to our Suffolk house we have our own leafmould, it’s free and it’s beautiful. 

Pile up deciduous leaves, leave them for a couple of years and voila ! The easiest recipe you’ll ever find. 
Leafmould covers bare winter soil, reduces the need to water, enriches the soil and remains nearly black even when dry and in the same way dark walls are a foil for pictures prints etc..leafmould is a beautiful foil for acid green spring shoots.


Tony and I planting the last of the tulips mid November.

Tony and I (mainly Tony) planted nearly 1000 bulbs last month. Two thirds were tulips the nearly black ‘Queen of the Night’ as well as ‘Sorbet’ and ‘Barcelona’ and one third alliums, a mix of Purple Sensation and Azureum. In the time it took me to plant 20 bulbs Tony had planted 100 which is why in the picture he’s up my end as he had done his lot and was helping me finish mine.


Nearly black 'Queen of the Night'  tulip bulbs about to be covered in soil then leafmould.


After the addition of leafmould
Black (nearly) in the Vegetable Garden.


Beans

This year we grew Blauhilde a very dark purple (about as close you’ll get to black) climbing french bean. Not only did it look wonderful in the vegetable garden the beans were as prolific as they were delicious with a really nice texture and no string. I can’t recommend it highly enough. The only thing to note is they turn an olive green when cooked.


Last month.Beans left to form seeds 


These pods were left as an experiment to produce seeds for replanting next year. However they have to be dried very carefully to be successful. We'll buy seeds too.

Radicchio

This year we grew ‘Rosa de Treviso’ even now it’s still sitting in the vegetable garden quite happily and I’ll use the last of it this week in my favourite Ina Garten recipe;

Conchiglie al Forno with Mushrooms and Radicchio

Next year I’m planning to grow Chioggia Radicchio which looks like a mini cabbage as my favourite way to eat radicchio is griddled and this type lends itself better to griddling.


Rosa de Treviso radicchio

Black and on me

Bogs

Black boots that will never go out of style - Bogs. I love my Bogs, at the weekend when I’m outdoors I live in them. You're supposed to wear them on the big side to allow warm air to circulate round your feet so you only need normal socks and they’re very easy to pull on and off. They keep your feet warm and dry whatever the weather. Worth every penny.


My trusty Bogs


0

Wednesday 4 December 2013

Crab Apples - Flowers, Foliage and Fruit


They look like winter cherries

Crab apples to decorate 

I absolutely love crab apple trees, so pretty and so productive, from their lovely blossom in spring right through to bright little fruit in the autumn which stay happily on the tree right into winter. Just when the garden is looking particularly stark, they provide vibrant splashes of colour and as well as being ornamental, crab apples are a food supply for birds and with a minimal amount of effort food for us too. 

If you have a few trees and can afford to, cut some branches and you’ll have an arrangement that lasts weeks and weeks.

Crab apple branches with their leaves about 3 weeks ago

Once all the leaves have come off you’ll be left with just the brightly coloured fruit and twiggy branches - very architectural, very elegant and very easy to do.
I almost prefer them leafless and the crab apples don’t drop, in fact the opposite is true, when you’re picking them for jelly you have to fight them off the tree.


Three weeks later, no leaves but still looking lovely, remove the leaves as they die.

Crab apples to eat


I had never made crab apple jelly before or any kind of jelly come to that but with the right equipment it was really, really easy.
I think the only crucial piece of equipment, that you may not already own, is a jam straining kit. My jam straining kit (by Tala) cost less then £5 and consisted of a chrome wire stand and a washable, reusable nylon straining bag. 
The bag looked small but once the fruit was cooked and a bit collapsed it held a suprising amount. 
Everything else like measuring jugs, wooden spoons, large saucepan etc...you probably already have.
I did buy a maslin pan partly too, because I’m a sucker for kitchen equipment but also because I’m planning to bombard everyone with membrillo, medlar and crabapple jelly for Christmas and forever more, but if you don’t overfill a regular large saucepan I don’t think it’s that necessary.

In the maslin pan stalks and all. About 1/3 were bigger so I cut them up.


Crab apple jelly recipe


2 kg crab apples
500g caster sugar ( approximately but use the 7/10 ratio rule)
1/2  lemon, juiced

Wash the apples, removing any obviously rotten bits it’s fine to leave stalks but not twigs! Put in a saucepan, fill with water to just cover the apples. I used some small sour apples too, so cut them up to the size of the crab apples
Bring to the boil and simmer until the fruit is soft (about 30 minutes).
Pour the pulp into a jelly bag or several layers of muslin and let drip into a pan. Do NOT squeeze the bag or it will make the juice cloudy. Lots of recipes specify overnight but my bag seemed to stop dripping after a few hours.
Measure the juice, and add sugar in the ratio of 10 parts juice to 7 of sugar. Add some lemon juice, then bring to the boil, if necessary stir to dissolve the sugar.
Keep at a rolling boil for 40 minutes, skimming off the froth. To test the set, chill a dessertspoon in the refrigerator.
When the jelly is at setting point, it will solidify on the back of the spoon. 

Pour into warm, sterilised preserving jars ( smaller ones are better) and tightly seal while still slightly warm. Store in a cool dark place.

I read that smaller jars are better because if you repeatedly put spoons etc into the jar it can cause it to liquefy.

The Finished jelly. These pretty jars came from Heals and they're the perfect size.

Crab apples in the garden


I now have five crab apple trees in my garden.
Two were there when we bought the house (no idea what varieties) and I planted three more (two John Downie and a Red Sentinel) this year. 
I’ve been so delighted with them I’ll plant more when I can think of a suitable place. 


Equally ornamental without their leaves


2

Wednesday 27 November 2013

Snappy Dresser

On display; cups and platter by Anthropologie, pumpkin soup tureen by my mother

The Idea


I once saw the comedian Jack Dee being very funny about growing up with a Grandmother who’s mantra was “Don’t buy it I’ll make it.”

Lovely when it’s a cake but as Jack explained not so great when it’s a Superman costume and the homemade version is knitted.

My children claim I am the same. I am endlessly outraged by the price of things and always trying to make them instead, sometimes successfully but quite often by the time I’ve bought all the necessary equipment it turns out pricier than if I’d just bought it ready made...

HOWEVER when it comes to renovating and up-cycling old furniture instead of buying it new or already renovated it’s almost always really worth it.


My finished, big, fat, fake dresser.

Where to begin


Auctions, car boot sales and junk shops are a brilliant source of really, really cheap and solidly built furniture that with a bit of time and attention can be transformed into something fantastic. Even if you employ someone to do it all for you, with bigger pieces particularly, you’ll still end up paying less and have something customised to your taste and space.
The dresser in my kitchen is a case in point.
I had seen a really beautiful one in an antique shop in Cornwall. It was perfect, except the price - it was eye wateringly expensive. Since selling an organ to finance it was not a convenient option I decided to make my own.
The previous owner of our house had left behind a big quite unattractive orangey pine side board with drawers. The drawers were very difficult to get in and out, the inside had only one big shelf and no base BUT it was really solid and the perfect size.
It’s the kind of sideboard I have seen sell at auction from anything between £30-£120.


Apologies for the awful photo, but here you can see the old sideboard with new top to half way through.

 Making the top part


In this instance, because I was already in the middle of an entire house renovation overseen by my architect sister-in-law, she did me a proper CAD drawing for the joiner based on a photo of the Cornish dresser I loved.
However this isn’t always necessary, lots of times I’ve done a scale drawing myself by hand, simply by measuring from a picture of something I'm inspired by or want to copy to get the proportions correct and then adjusted heights widths etc accordingly to fit my space.
Alternatively you can skip the drawing stage altogether by giving a good carpenter or joiner, you trust, an image to copy.


 Raising up the bottom shelf meant things weren't  hidden when the door was shut


Remodelling the bottom part


The carpenter put in a base in the old sideboard so things weren’t sitting directly on the floor, took out the single, full depth shelf and replaced it with two. Because the cupboard was so deep these shelves were shallower than the bottom shelf and although this meant there was slightly less shelf space, but you could see everything properly.


The Drawers


The carpenter fixed the runners and drawers so the drawers didn’t tip as they slid out and divided up the inside of the drawers to my specification: 

One for cutlery


The drawers are lined with wallpaper samples.


One for papers; post, menus, seed catalogues, colour charts etc..

Having a drawer for papers stops them accumulating on kitchen surfaces


One for everything else, first aid, foreign change purses, marker pens, tape measures, torches, batteries, kitchen light bulbs, napkins etc..etc..

Small compartments stop it getting too messy


 Background detail - tongue and groove


I'm happy to display ANYTHING


The Cost ?


My fake antique dresser cost about a fifth of the dresser in Cornwall. Seriously. 

0

Tuesday 19 November 2013

The Mighty Beetroot


These pink and white striped Chioggia are as pretty as they are delicious.


Anthony and my Vegetable Garden.


I am new to proper vegetable growing, up until three years ago my only outside space was a tiny, very shady London garden. I managed to grow runner beans in a flower bed between the Hellebores and Dicentra, a few (mostly green) tomatoes and radishes in pots on my terrace, lots of herbs, but nothing much else. 
I was restricted by lack of space, time and sun but most importantly lack of knowledge and experience. 

This year we replaced our (new to us) but very old, rotten and falling down greenhouse with a new one and added cold frames and turned a big muddy expanse outside the kitchen window into a proper vegetable garden with raised beds and gravel paths. 

However, the reason I have a flourishing vegetable garden is not because I now have space, sun and paid help but because of Next-Door-Anthony. I Lord it around with a trug and trowel, waggling seed packets of things I want to grow and sometimes even a hose, but the success of every single vegetable we’ve grown is entirely down to him. I don’t think there is one thing I have learnt about vegetables since last March, when we started, that hasn’t been spoon fed to me by Anthony. He is not a gardener by trade, he’s a builder but he is the most green fingered person I have ever met, has been growing vegetables for 40 odd years and shares my fervent interest in cooking, eating and growing them. In the same way most people discuss politics or religion we discuss the merits of various beans, tomatoes and beetroot. 


A trug full of Chioggia.

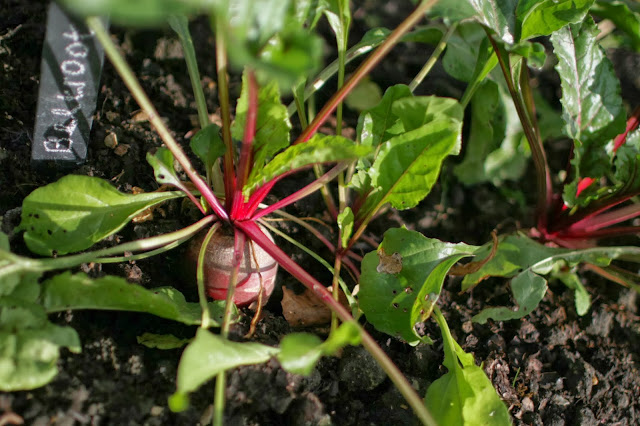
This year's beetroot varieties: 

Bull's Blood, Chioggia, Golden Burpee

I absolutely love Beetroot, but I think it’s a bit like the Royal family, it divides opinion - you either love it or don’t see the point.
My daughter Mary recently asked  “Why would I eat something that tastes like dirt with sugar?” 
But that’s exactly why I find it delicious - its earthy sweetness. 

Beetroot, as well as being incredibly pretty, both in the vegetable garden and on your plate, is also very forgiving. I don’t know if this is normal (never having grown it before), but I have beetroot that has sat quietly in the ground since August without swelling to some fantastic and inedible size, all that seems to have happened is it’s stayed fresh and perky, ready to be picked whenever I have a fancy for it.

One last reason to love beetroot is you really can eat all of it. I treat the leaves exactly like spinach, raw or wilted - either way they’re great.

Below are 3 easy recipes

The first is from one of my very favourite restaurants, Morito in Exmouth Market (the cafe style establishment and little sibling to the wonderful Moro restaurant next door).
Occasionally when I’ve eaten there I’ve seen Samantha or Samuel Clark (the head chefs and owners of both) working in the open kitchen and I feel genuinely star struck. I honestly don’t think I’d care if I saw George Clooney or Lady Gaga - but those two? I’m weak with admiration...

Beetroot Borani 

Serves 6-8 as a first course

Ingredients


500g of Beetroot


400g Full-fat Greek yoghurt


3 tblsp Olive oil

1 Clove of crushed garlic

Small bunch of dill

1/2 packet of Feta cheese

A handful of shelled pistachios (optional)


Scrubbed and ready to roast


Roasted beetroot. These took about 50 minutes at 190c

Method

Boil or roast the beetroots whole till easily pierced with a skewer.
Remove the skin and cut into rough chunks.
Grind in a blender with the olive oil, yoghurt, garlic and seasoning.
Spoon into a dish and scatter dill fronds, pistachios and crumbled feta on top.
Serve with flat bread or crudites
Tastes as good as it looks and SO EASY
Morito serve theirs with walnuts not pistachios, but I prefer the taste and look of pistachios. If you decide to halve the quantities don’t be tempted to use the whole clove of garlic, it’s too much.


Beetroot and Pomegranate Salad with Pomegranate Molasses.

Pomegranate molasses has a sour almost citrus flavour and is lovely with the sweetness of the roasted beetroot.
I used half Chioggia and half Bull's Blood in my salad.

Ingredients

300g Beetroot 
A handful of Pomegranate seeds 
1 tblsp Pomegranate molasses
2 tblsp Extra virgin olive oil
2 tblsp Lemon juice
A handful of Mint and Coriander leaves chopped.
Method

Roast the beetroot until easily pierced with a skewer, peel and cut into large dice.
Whisk together the Pomegranate molasses and lemon juice then add the olive oil and season with salt and pepper. 

Stir through the beetroot with the pomegranate seeds, mint and coriander. 
Sprinkle extra pomegranate seeds, mint and coriander on top.

Particularly good with chargrilled lamb or smoked fish.


Beetroot and Quince Soup with Horseradish Creme Fraiche


Love the colours. I have A LOT of quinces....


Ingredients
Serves 4
500g Beetroot peeled and sliced
50g Quince peeled and sliced
2 Medium onions sliced
3 Tblsp Olive oil
1 Red chilli deseeded and finely sliced
2 Bay leaves
750ml Chicken or vegetable stock
Salt and freshly ground pepper


Peeled Chioggia. The stripes disappear when cooked.


Method

Soften the onion and chilli in the olive oil until translucent.
Add the beetroot, quince, bay leaf and stock and simmer until very soft.

Remove the bay leaf, liquidize and adjust the seasoning.
Strain the soup by pouring into your biggest sieve and stirring with a spoon until you’re left with about 1/4 of the pulp in the sieve which you discard.

Keep the (now thinner) soup below. This sounds like a big hassle but it’s easy and quick and improves the texture of the finished soup which is fairly grainy due to the addition of the quince.
Re heat and serve with a dollop of

Horseradish Creme Fraiche

Mix together:
4 tblsp Creme fraiche
2 tsp freshly grated horseradish
Salt and freshly ground pepper
The heat of the horseradish and lactic acidity/sourness of the creme fraiche balances out the sweetness of the soup. If you can’t get fresh horseradish try a squeeze of wasabi paste instead. 


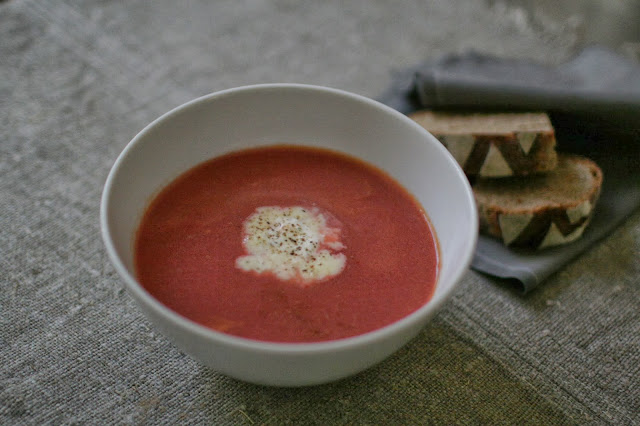
The finished soup is a delicate pink
0

Monday 11 November 2013

Jars and Organising


My regimented jars of all the things that were once languishing in the bottom of 'The Drawer ' (everyone has one)...


A Place for Everything.

The phrase "A place for everything and everything has its place."
While being super annoying does really help when you're trying to be slightly less chaotic. I have the misfortune to be a neat-freak trapped in the body of an untidy person. My family are just really untidy, all of them. 
It’s a constant and mostly losing battle to try and keep some order in our house.
I also have a brain like a sieve so when I came up with the idea of painting a giant blackboard on our kitchen chimney breast to to note down all the essentials I was likely to forget (like my name), I needed to find a way of not constantly losing the chalk. 


A wall painted with blackboard paint is nicer than an actual blackboard as it has some texture. 


Chalk boxes aren’t very pretty and they’re small so easy to misplace. 
So I put shelves on the blackboard for my chalk jar and having had a great success in NOT LOSING THE CHALK because it was in big jar on it’s own special shelf, I added the other essentials we seemed to spend approximately 20% of our lives looking for:

1

Tuesday 5 November 2013


Adieu to the tomatoes


In the beginning... Every variety was grown from seed.

Only three weeks ago this was what my tomato crop looked like. In the trug are Tigerella, Black Russian, Brandywine, Sungold, Suncherry, and Black Cherry.

Summer is really over.


I know this not because the clocks have gone back and my calendar says so, but because my seemingly endless supply of beautiful ripe tomatoes is limping towards it’s inevitable end. The cucumber plants we were growing in the greenhouse have already met their maker. The vines, despite looking almost entirely dead for several weeks, valiantly continued  to produce increasingly misshapen (but still delicious) little fruit until the weekend before last when we finally had to admit defeat, dig them up and put them on the compost heap.  The rest of the tomato plants will be following soon (some have already gone). What fruit still remain on the outside vines are struggling to ripen, though amazingly, the smaller ones in the greenhouse are still turning red.


This week in the greenhouse. Small Tigerella tomatoes are still ripening. 
I don't think these Brandywine will ripen.


Now I have so few tomatoes left I have come over all reverent towards them. Below are two ways to make the most of the last few in a delicious and slightly more autumnal way.


The World's Greatest Sandwich.
Not pretty, but utterly delicious. If I had one tomato left in the world this is how I'd use it. The sandwich only requires a smear (literally), but that smear of acidic tomato cuts through the fattiness of the ham and is essential. The ham is horribly expensive but a little goes a long way and the pig's acorn diet gives it a completely unique, nutty, sweet flavour.

The Catalan.


Dark rye sourdough bread, an acidic tomato, a clove of garlic, your best olive oiljamón Ibérico de bellota.


Rub the bread with the garlic, then smoosh on (this is a technical term) the juice and seeds of the tomato and discard the skin.


Drizzle olive oil on both pieces of bread, lay the ham in a single layer, top with your other piece of bread. Perfection. 

Pickled Tomato Confit


At this time of year a fresh tomato salad feels wrong, but a pickled salad almost like a confit with a woody herb like rosemary seems suitably seasonal. The vinegar turns the onion a beautiful magenta so it looks lovely too. Serve on it's own, smeared on toast, with cheese - it's particularly good with a chalky goat's cheese, great in a steak baguette too.

You will need:


1kg of small tomatoes 
2 medium red onions 
2 tblsp demerera sugar
4 tblsp olive oil
2 tblsp red wine vinegar
4 tsp finely chopped fresh rosemary

Cut your tomatoes in half if they're cherry sized and into 4 if they're any bigger and scoop out the seeds.

Lay them skin side down on an oiled baking tray (use half the oil), season and roast at a very low temperature 110c for 2-3 hours until soft.

Turn them over halfway through to allow any juices to drain away. Allow to cool.

Finely slice the red onions and soften in the remaining olive oil with a pinch of salt and the rosemary.

Once softened add the sugar and vinegar and simmer until reduced and syrupy.

Allow to cool slightly and gently stir through the tomatoes.

Admire the colours. 


Pickled tomato confit.


3